I just acquired a bunch of wood from my wifes mother. A lot of different types of sheet goods, and a few pieces of butcher block. Without purchasing anything extra, I constructed a stand for the new bandsaw. Using the Kreg pocket joint jig, the stand went together very quickly. Just blindly cutting the wood for frame, I became very lucky when a piece of the butcher block fit perfectly as the tabletop. The butcher block top made it look as if it was cut just for this stand. After running the saw without being bolted down, I was surprised that most of the vibration was gone. I almost want to stain the wood and use the stand in the kitchen.
The wonders of Harbor Freight….

After getting a new band saw, I needed a way to balance the two wheels. Being a small amount off-balance will make the table vibrate, making it hard to complete precise cuts. One way of balancing the wheels without having to take them off, uses a dial indicator. Dial indicators can be used to show small amounts of change in distance. The local hardware store had a set for $79. Thinking that was too much, I checked Harbor Freight….there was the same set for $29. Maybe not the best quality, but it would work perfect for what I am doing.
Liam’s rocking chair is fixed

Recently I fixed an old children’s chair that had one of the rockers broken off. Using the band saw i just purchased, I cut two new rockers using the old one as a pattern. I thought it looked weird the way the rockers were originally placed; so I moved them forward a bit…bad idea. Little man now can flip it over backwards. Anyway, it was a reason to use the new band saw.
Dust Filtration Controller
After doing some woodworking projects in our basement one night, I quickly noticed the fine dust that accumulated on everything in sight. I could only imagine what it was doing to the inside of my lungs if I were not wearing a dust mask. After looking online at various dust filtration systems, I was not to thrilled at there price tags. The machines were basiclly just a blower motor inside a box, that pulled the air through various filters and then returned the filtered air back into the workshop. After a little searching around the web I found a basic design from an old woodworking magazine. The article gave me starting point to base my design on. After looking at various features from different companies I decided on a few I would like included in my design.
- Compact design
- Stardard filter sizes
- Wireless remote
- Various Speeds*
First I needed to source a blower motor. After a few days searching eBay and craigslist, I found a surplus 4 speed blower. Then came the construction of the box. With very little on paper, I just went at it, building the box using a store bought filter for the size. With the surplus of lumber I have the basement, it was not too difficult to construct. Once the box was built the fan was mounted and I was able to turn the motor on/off via a switch. Speed selection was not that important at the moment so I decided to use a slow to med airflow setting. Speed was selected by connecting different wires to a common, so unless I had a 4 way switch one speed would do. I figured single speed would be fine for the moment; plus too high of a speed and I would disturb the air too much, blowing the dust away from the collector.
Next I moved onto designing the controller. From the start I figured that using a PIC microcontroller would be the easiest route. The circuit was started on a breadboard while planning to make a pcb for it later. The PICBASIC programming language I purchased years ago came in handy while building this. PICBASIC performs well on simple devices like this. To turn the fan on I decided to use one of the extra Solid State Relays I had laying around from a previous project. Now came the remote control portion of the project.
After trying to decide if the remote would be IR or RF, I noticed a Nikon IR remote I had purchased a while ago for an older camera. When we upgraded our Nikon DSLR we gave my sister the old one. I just figured the remote would work with the newer DSLR. I was wrong; for some reason Nikon did not include to IR feature in the newer more expensive camera. So I was left with a small IR remote that had only had one button….perfect for this project. Plus no transmitter case would have to be built if I would have used the RF modules I own. Using the remote proved to be challenging as I have never used a microcontroller with IR before.
I am sure there are easier ways of doing this while not using PICBASIC but I tried to make it as simple as possible for me. Instead of ordering an IR reciever I cracked open a broken SONY CD player and salvaged one. The reciever was mounted on its own little carrier board with that I soldered header pins to. Now it should not be to difficult to finish the IR part of the project. Well…many late nights and one week later I finally was able to interface to remote with the PIC. IR protocols are very different and locating the timmings for the Nikon required a little bit of digging on the internet. The feeling you get when something finally works is very rewarding.
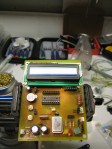
Switching the SSR on and off with the PIC was easy, so now all that was left was to design the schematic in Eagle CAD. After a little bit of a learning curve I began to get the hang of using the software. Eagle CAD is very useful but some features just seem weird in the way they were implemented; but by being free I really cannot complain. Once the schematic was made, next came the board layout. Even with its small size restricitions on the free version, the space was perfect for this design. I eventually created the board as kind of a small development board for the PIC 16F88. That way I could reprogram/reuse the board in future projects if needed. With the board design finished, next came the fabrication of the board itself.
Different online options exist when it comes to having a pcb produced. With a turnaround from overnight to around a month, depending on what you wanted to spend. Since it was the first board, I decided to etch the board myself. It had been a few years since the last time I etched a pcb. Previously I have used the toner transfer method and found it to be fairly reliable. The only problem was the special inkjet paper I used before could not be found at my house. With a little searching on the internet I kept seeing a method that used the glossy paper from magazines. This seemed like a good alternative as the paper I used before was a more expensinve glossy inkjet printer. Plus free magazines are fairly easy to aquire from people.
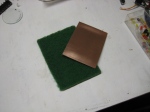
After a trial and error process using different papers from various magazines, I finally got a winner with my wifes older photography issues. It didnt really matter it the magazine page had text, pictures or both. Getting the copper completly clean helps the toner to adhere better. After transfering the toner with an old clothes iron, the board was soaked in water for a few minutes and the excess paper came right off. Not having any ferric chloride I decided to try a mixture of Muratic acid and HydrogenPeroxide. Supposedly it is not as harmful to the enviroment as the ferric chloride is, as the muratic/peroxide mixture completely dissolves the copper instead of concentrating it. I really didnt look into the chemistry of the two that much, I just know that the muratic mixture worked great. Plus muratic acid is cheap and available from a lot of different stores in the swimming pool section.
Once the board was etched and cleaned the drilling began. I burned through a couple mini drill bits while fabricating the pcb, as they are very tough. Populating the board was no big deal, and went by smoothly. Now I need a case to house the pcb, power supply and the SSR. At 1a.m. no stores were open, so scavaging began. I spotted a dead CDROM drive, and dismantled it and placed all the components inside, and cutting a hole for a computer power cable receptical. Once I flashed the PIC, a simple test was performed before being hung in our basement. Now the fine dust after a woodworking project can finally be filtered out of the air….with the press of a button.
First Post

Just thought I would see how the WordPress app works for the Android. Here’s a project I just finished. It is a programmable dust filtration controller for woodworking. I will put more info/pictures up later.


